3.6 Illumination and the flash⧉
Light is not just something a photograph needs more of. Once there is enough of it, how it falls on the scene decides almost everything about the picture, and a photographer spends much of their craft controlling it.
Almost everything about how a light behaves comes down to three characteristics. The first is its direction: where it comes from relative to the subject and the camera. Direction is what turns a flat projection back into shape, deciding where shadows fall, whether form is modeled by raking side light or flattened by frontal light, and whether a back or rim light peels the subject off its background. The second is its extent, the apparent (angular) size of the source as seen from the subject. Extent sets how hard or soft the light is: a small source (the bare sun, a bare bulb) throws sharp-edged shadows and tight, hot highlights, while a large one (an overcast sky, a softbox close in) wraps around the subject, softens every shadow edge, and spreads highlights into broad gentle sheens. The third is its color, the source's spectrum summarized as a color temperature, which sets the warm or cool cast the camera must then balance (midday sun is near neutral, it warms as it sinks toward the horizon, and open shade or an overcast sky runs blue). Direction, extent, and color are the whole vocabulary: every tool in this chapter, bounce and diffusion, reflectors and softboxes, the sun and the sky, the flash and its modifiers, is ultimately a way of adjusting where the light comes from, how big it is, and what color it is.
It helps to name the goals that good lighting juggles at once, because they pull in different directions:
- Provide enough light. The first job is exposure and signal-to-noise: get enough photons on the sensor that the image is not buried in noise (→ Exposure, Noise, signal-to-noise ratio and dynamic range).
- Manage contrast. Real scenes can span a far wider range of brightness than a sensor or a print can hold. Lighting sets the ratio between the brightest highlight and the deepest shadow, and much of the work is keeping that ratio inside what the medium can record (→ dynamic range, HDR merging).
- Manage 3-D rendition and layering. The direction of light is what turns a flat projection back into shape. Side light carves out form with shadow (modeling); a rim or back light peels the subject off its background; the interplay of lit and shadowed planes gives a scene depth and separates its layers.
- Manage local 3-D texture. At the fine scale, raking light across a surface exaggerates every bump and pore, while frontal or soft light flattens them. This matters most for skin: hard, grazing light finds every wrinkle and blemish, which is why portrait and beauty work so often softens and frontalizes the key.
- Manage the size of highlights. As we saw under the BRDF (→ Light and physics), a specular highlight is the light source blurred by the material, so its size and softness track the size of the source. Controlling highlights, on skin, on a car, on glassware, is largely controlling how big the light is.
One preference runs through most of these: photographers usually reach for diffuse, soft light. A large, soft source lowers the contrast so the medium can hold the whole scene, de-emphasizes skin texture and small defects by lighting them from many directions at once, and spreads specular highlights into broad, gentle sheens rather than hard hot-spots. This is why so much of the craft below, bounce, diffusion, reflectors, softboxes, is really one move: make the apparent source larger. Hard light has its uses (drama, texture, crispness), but soft light is the safe default, and the tools of lighting are mostly tools for softening.
There are two ways to get the light you want. You can work with the light that is already there, the sun and sky, and shape it. Or you can add your own, from a flash or studio strobe. This chapter takes them in turn: natural illumination first, then the flash and how it meters itself, then the indirect tricks that soften any source, and finally how several lights combine into a deliberate setup.
3.6.1 Natural illumination⧉
The oldest light source is the sun, and it is never just one light. What reaches a subject outdoors is the sum of two very different sources: the sun, a small, intensely bright disk that casts hard, sharp-edged shadows, and the sky, a huge soft dome of light scattered by the atmosphere that fills those shadows from every direction. The ratio between them, and their color, changes continuously through the day and with the weather, and reading that change is the first skill of available-light photography.
Time of day. When the sun is high at noon it is a hard toplight: short, steep shadows under the brows and nose, high contrast, and a fairly neutral white. As it sinks, its light travels a longer path through the atmosphere, which scatters away the blue and leaves it warm, while the shadows lengthen and soften as more of the illumination comes from the sky. The prized window is the golden hour just after sunrise and before sunset, when the sun is low, warm, and gentle, raking across the scene to reveal texture and wrapping the subject in soft, directional light. Just after the sun drops below the horizon comes the blue hour, when nothing is lit by the sun directly and the whole scene is lit by the deep-blue sky alone: very soft, very even, cool, and dim enough to want long exposures. Photographers plan around these windows because the same place looks completely different depending on where the sun sits. The swing is measurable as a color temperature (Figure 3.6.1), and it is exactly what white balance (auto white balance) has to track.
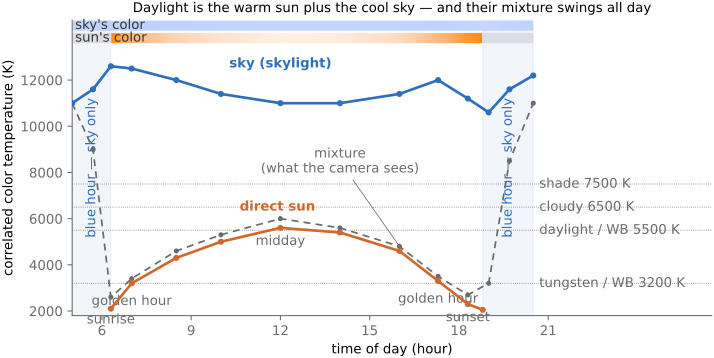
Weather and the sky. Cloud is a giant diffuser. An overcast sky turns the whole dome into one enormous soft source, erasing shadows and dropping the contrast to almost nothing, flattering for faces and forgiving of exposure, if flat and cool. A clear sky gives the hard-sun-plus-blue-fill combination above. Haze, fog, and pollution scatter the light further and lift the shadows even more while cutting distant contrast (aerial perspective). The quality of natural light, its softness, direction, and color, is really a statement about the relative strength and size of these two sources, sun and sky, as the atmosphere reshapes them through the day.
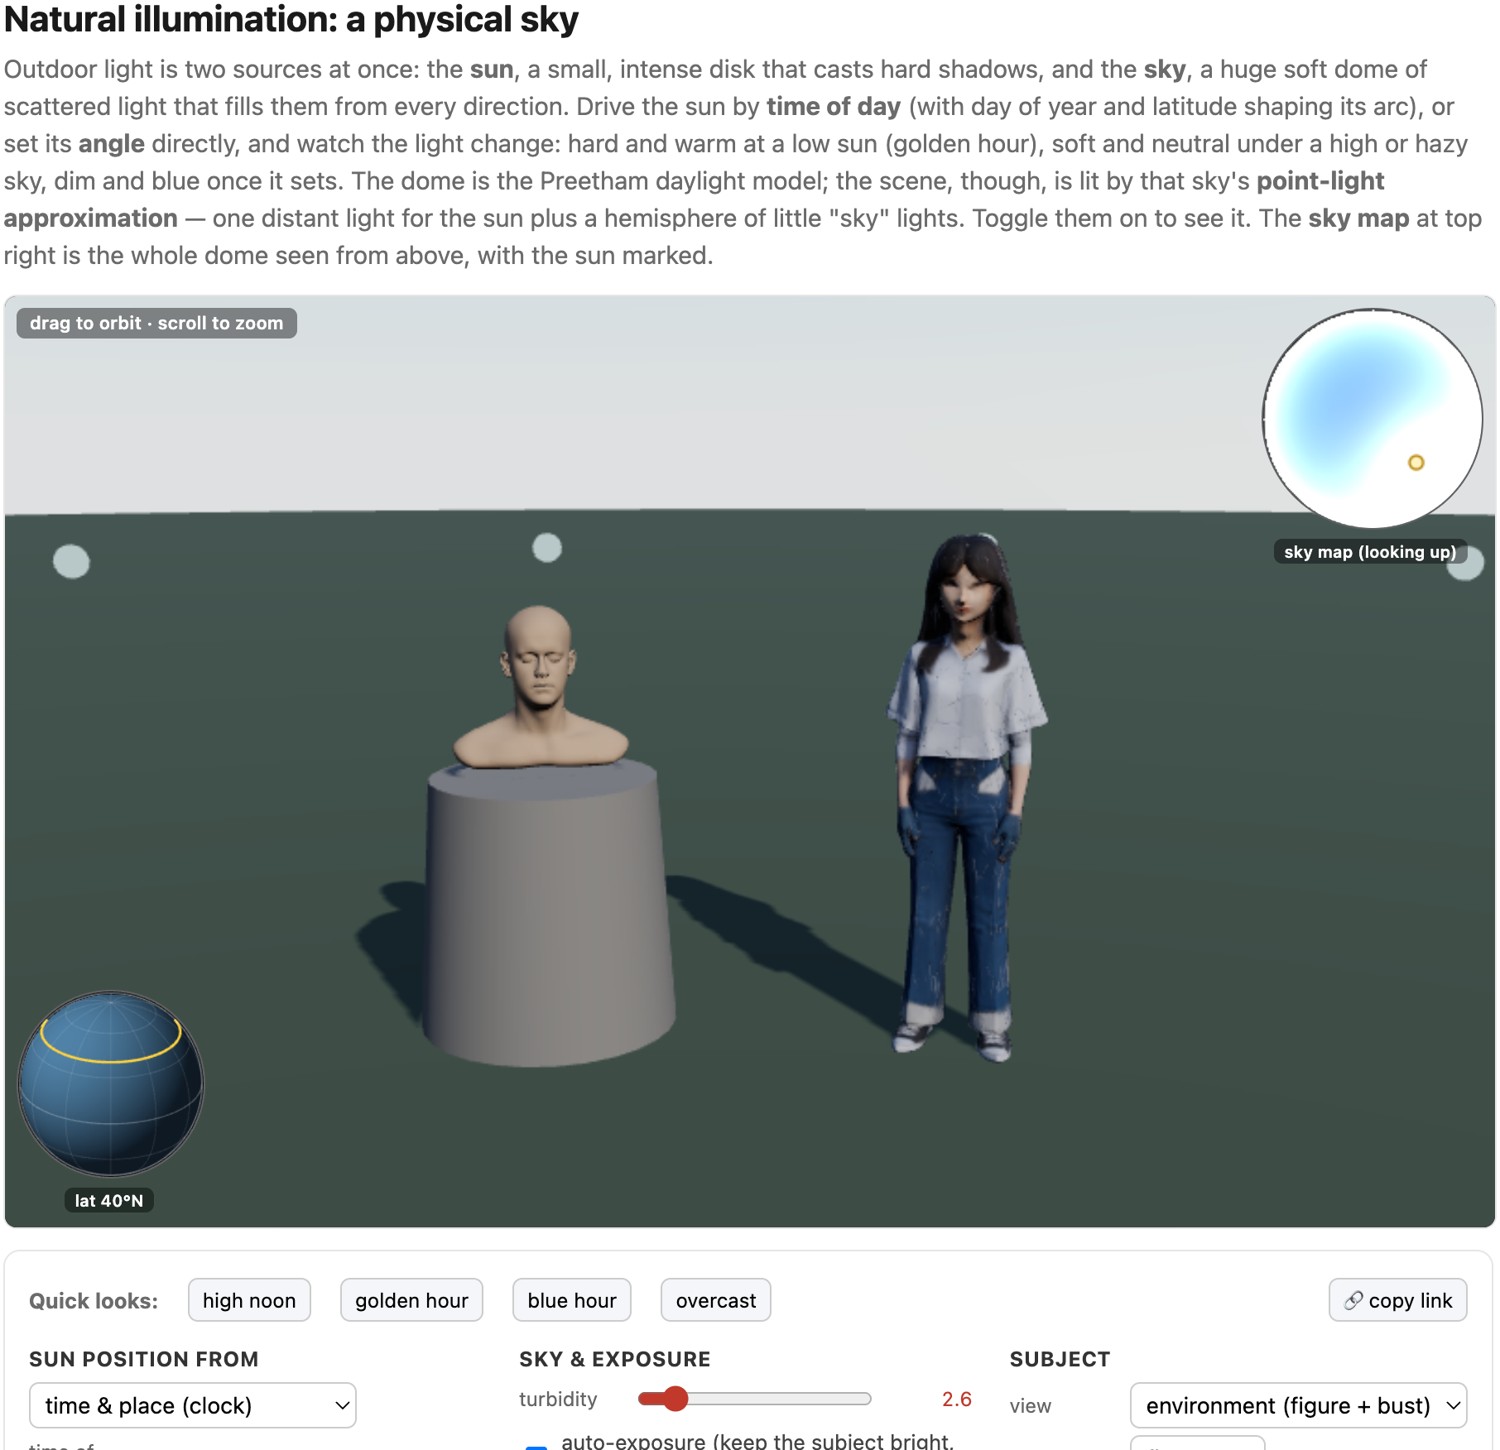
Models of the sky. Because the sky's brightness and color vary smoothly with direction and with the sun's position, they can be modeled. The CIE standardizes a family of sky luminance distributions (from clear through overcast), and computer graphics leans on analytic sky models: the Perez all-weather model (Perez et al. 1993 (all-weather sky)) and Preetham et al.'s daylight model (Preetham et al. 1999 (daylight model)) give the sky's radiance as a function of a point's angle to the sun and the sun's elevation, tuned by a single turbidity parameter (how hazy the air is), and Hošek and Wilkie later improved the accuracy, especially near the horizon and in the sky's color (Hošek & Wilkie 2012 (sky-dome model)). These are the models behind the "physical sky" in every renderer, and they let us drape a believable sun-and-sky over a synthetic scene from just a few numbers.
That connection, from a few sky parameters to the light on a face, is worth playing with directly (Figure 3.6.2).
3.6.2 Flash⧉
When the available light is missing, wrong, or too contrasty, the photographer brings their own, carried in a box. A photographic flash is a source engineered to dump a large, brief, repeatable burst of light on command, and the whole design problem is packing enough light into a few thousandths of a second, aiming it, and metering it.
A short history, and the power problem. The earliest flashes were literally fires. Victorian photographers burned flash powder, a pinch of magnesium (later magnesium mixed with an oxidizer), igniting it in an open tray for a blinding, smoky, and genuinely dangerous flare that injured more than a few operators. The flashbulb tamed it around the 1930s by sealing fine magnesium or zirconium foil in an oxygen-filled glass envelope: one clean, bright pop per bulb, still hot enough to craze the glass and occasionally shatter, and thrown away after every shot. The modern electronic flash, developed by Harold Edgerton at MIT (whose strobes we met freezing bullets and milk drops in Motion blur), replaced the fire with a xenon tube: charge a capacitor to a few hundred volts, trigger the gas to conduct, and the stored energy dumps through the tube as light in under a millisecond. Its virtue is that it is reusable and controllable, good for thousands of firings, each one metered or quenched. This is where "power" enters literally. A studio strobe stores its energy in that capacitor and is rated in watt-seconds (joules), the electrical energy it can dump, from a few tens of joules in a speedlight to hundreds or thousands in a studio pack. Watt-seconds measure stored energy, not emitted light, so two flashes of equal joules can differ in output as their tubes and reflectors differ in efficiency. That gap is exactly why photographers also want a direct measure of the light.
The guide number. That light measure is the guide number (GN), defined operationally: for a correct flash exposure,
the f-number times the flash-to-subject distance, quoted at a reference sensitivity (almost always ISO 100) and, for a zooming flash head, a reference focal length. A flash with a guide number of 40 (metres, ISO 100) correctly exposes a subject at $5$ m with $f/8$ (since $40/5 = 8$), at $10$ m with $f/4$, at $20$ m with $f/2$. The logic is pure inverse-square: the flash is effectively a point source, so the light reaching the subject falls off as $1/d^2$, and to hold the exposure fixed as the subject recedes you must open up so that $N \propto 1/d$, keeping the product $N d$ constant. The guide number is that constant, a single figure that packages the flash's whole output into "how far can it throw a correct exposure." Because exposure runs on $N^2$, the guide number scales as the square root of anything that scales exposure: quadruple the flash power and GN doubles; quadruple the ISO and it doubles again, $\text{GN}(S) = \text{GN}_{100}\sqrt{S/100}$. The distance a flash buys grows only as the square root of its energy, which is why reaching twice as far takes four times the power.
From a guide number to photons. A guide number can be cashed out in the physical units we have been using all along. The flash's output in a given direction is a luminous intensity acting for the length of the pulse, a quantity in candela-seconds (the beam candela-seconds a flash meter effectively integrates); call it $Q$. By inverse-square the light dose it lays on the subject is a luminous exposure $H = Q/d^2$ (lux-seconds). A diffuse subject patch of reflectance $\rho$ then glows, while it is lit, at a luminance $L = \rho E/\pi$ (cd/m$^2$), so over the pulse it presents a luminance-time of $\rho Q/(\pi d^2)$, and that, seen through the aperture, is what the sensor integrates into a luminous exposure and, through the luminous efficacy and the energy of one photon, into an actual count of photons per pixel, by the same chain built in Image measurements as integrals. So a guide number, an ISO, a distance, and an aperture are not a folk recipe; they pin down a real number of photons on the sensor, in the same currency (cd/m$^2$, lux-seconds, photons) as every other source in this book. The correct-exposure condition $\text{GN} = N d$ is just that photon count held fixed: $\text{GN}^2 \propto Q\,S$, the flash's candela-seconds times the ISO.
Duration, power, and freezing motion. Because the burst is so brief, a flash is also a shutter made of light: when the ambient is negligible the exposure lasts only as long as the flash, so the flash duration, not the shutter speed, sets both the exposure and the motion blur. Turning the power down on a modern flash makes the burst shorter rather than dimmer over the same interval (an IGBT quenches the tube once enough light has come out), so lower power buys a shorter, motion-freezing pulse at the cost of less total light. That inverse trade of power against duration, its use to freeze fast motion down to Edgerton's microsecond sparks, and the flash's other timing virtue (a short, repeatable latency that lets it be triggered on the event itself for high-speed work) are developed in Motion blur.
3.6.3 Flash metering⧉
Sometimes the available light is wrong, whether too little, too harsh, or too contrasty, and the photographer adds light with a flash. Done well, this is dynamic-range management, more than just extra light. But delivering a precise amount of light in a pulse a few thousandths of a second long is its own automation problem, the flash counterpart of autoexposure, and how the camera solves it changed with the move from film to digital.
Through-the-lens, during the exposure (film). The oldest and most elegant method metered the flash during the exposure: in a film SLR a sensor in the mirror box watched the flash reflect off the film surface while the shutter was open and quenched the flash (cut its pulse short) the instant enough light had piled up. This measured the real light on the real film through the real lens and aperture, live, and it worked well. It is called off-the-film (OTF) metering. Its blind spot was that it trusted the subject to reflect an average amount, so a very dark, very bright, or shiny subject could fool it.
Digital broke that, and brought the pre-flash. A digital sensor cannot be metered the same way: its surface is a microlens-and-cover-glass stack, not a stable diffuse reflector like film, and the timing leaves no clean window to quench a flash mid-exposure. So digital cameras moved the measurement to before the frame. The camera fires a brief, low-power pre-flash a fraction of a second ahead of the shot, meters its return through the lens with the ordinary metering sensor, works out how much light the main flash must deliver, and then fires the main flash at that power during the actual exposure. This is why a modern flash photo is really two flashes a blink apart, why subjects sometimes blink in the final frame (they flinch at the pre-flash), and why the flash can seem to stutter.
Modern evaluative TTL. Because the pre-flash is read by the same multi-zone evaluative (matrix) meter the camera uses for ambient light, current systems fold in far more than one reflectance number: they weight the metering zones, use the distance the lens reports (a near subject needs less flash), try to spot and discount specular hotspots and mirror-like backgrounds, and balance the flash against the ambient so fill looks natural. Every maker brands its own recipe, Canon's E-TTL and E-TTL II, Nikon's i-TTL, Sony and Pentax's P-TTL, but under the badges they share the same pre-flash-plus-evaluative-metering design. They are convenient and usually right, yet because each shot is a guess from a single pre-flash they are not perfectly repeatable: reframe slightly and the power can jump. That is exactly why studio and precise work still sets flash power manually, metered once with a handheld flash meter or dialed in by reading the histogram, so it does not drift from frame to frame.
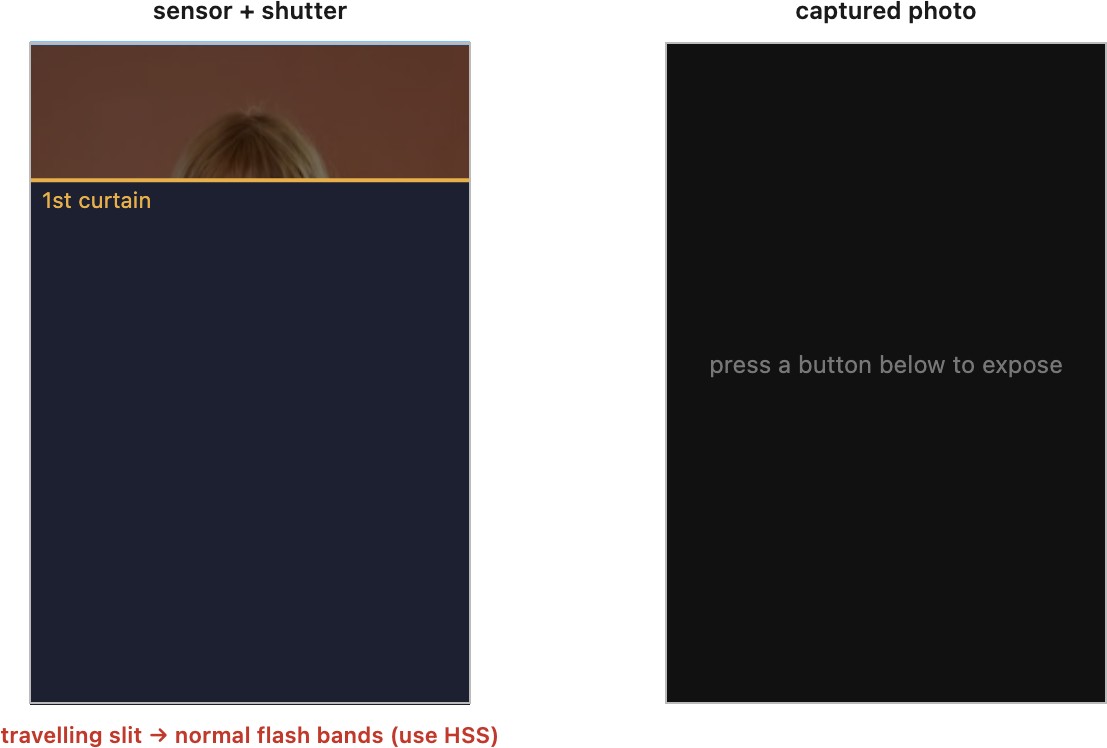
Sync speed and high-speed sync. A focal-plane shutter (the curtain in an SLR or mirrorless body) only fully uncovers the sensor up to its X-sync speed (~1/200 s). Faster than that, the shutter is a moving slit and a single flash pulse would light only the strip the slit exposes, so the flash cannot illuminate the whole frame. High-speed sync (HSS) works around this by turning the flash from a single burst into a rapid strobe that fires continuously while the slit crawls across, so every strip is lit as it is uncovered; the cost is steep, several stops of effective power and hence range, because the light is now smeared over the whole slit traverse instead of dumped in one pulse. Why exceed sync speed at all? The usual reason is bright daylight and a wide aperture: to throw a background out of focus outdoors you want $f/1.8$, but at $f/1.8$ in sun the correct shutter is already faster than sync, and you cannot slow it below sync without blowing the exposure nor stop down without losing the shallow depth of field you came for. HSS (or a strong neutral-density filter) is what lets you shoot fill flash at $1/2000$ s and $f/1.8$ together. A leaf shutter (built into the lens, opening fully at any speed) sidesteps the problem entirely and syncs at all shutter speeds, a real advantage for daylight fill. The interactive below makes the curtains, the moving slit, and the flash timing visible (Figure 3.6.3).
Fill flash. In harsh or backlit light, add flash at −1 to −2 EV below the ambient, enough to open the shadows without looking flashed. It is exactly dynamic-range management: you are not lighting the scene, you are lifting the dark end into the range the sensor can hold.
3.6.4 Indirect illumination and bounce flash⧉
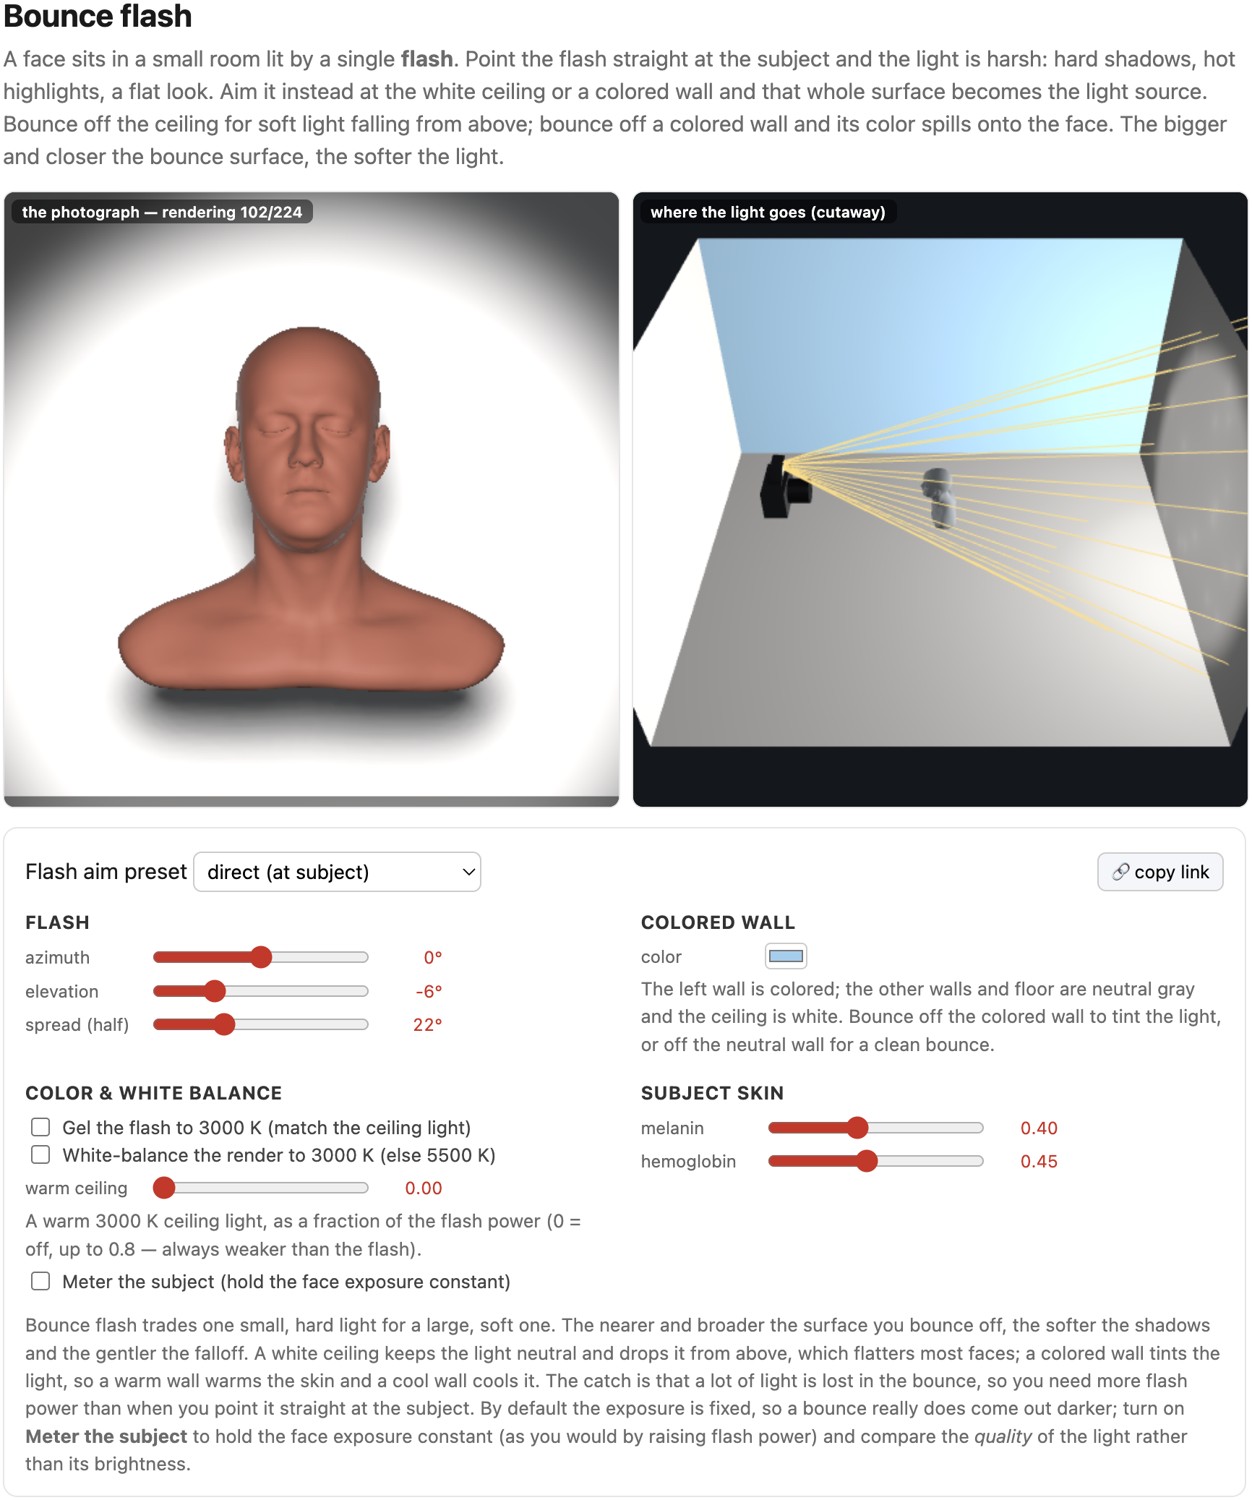
Never fire a bare flash straight at the subject. It gives flat, harsh light and red-eye. Bounce it off a ceiling or wall (~45°), or spread it with a diffuser, to enlarge the apparent light source and soften the shadows (Figure 3.6.4). Bouncing also tints the light: a colored wall dyes the bounced light its own color, which is why photographers gel the flash to match or white-balance for the mix. Taking the flash off-camera entirely gives directional, shaped light (→ Computational illumination, including computational bounce flash, Murmann et al. SIGGRAPH Asia 2016).
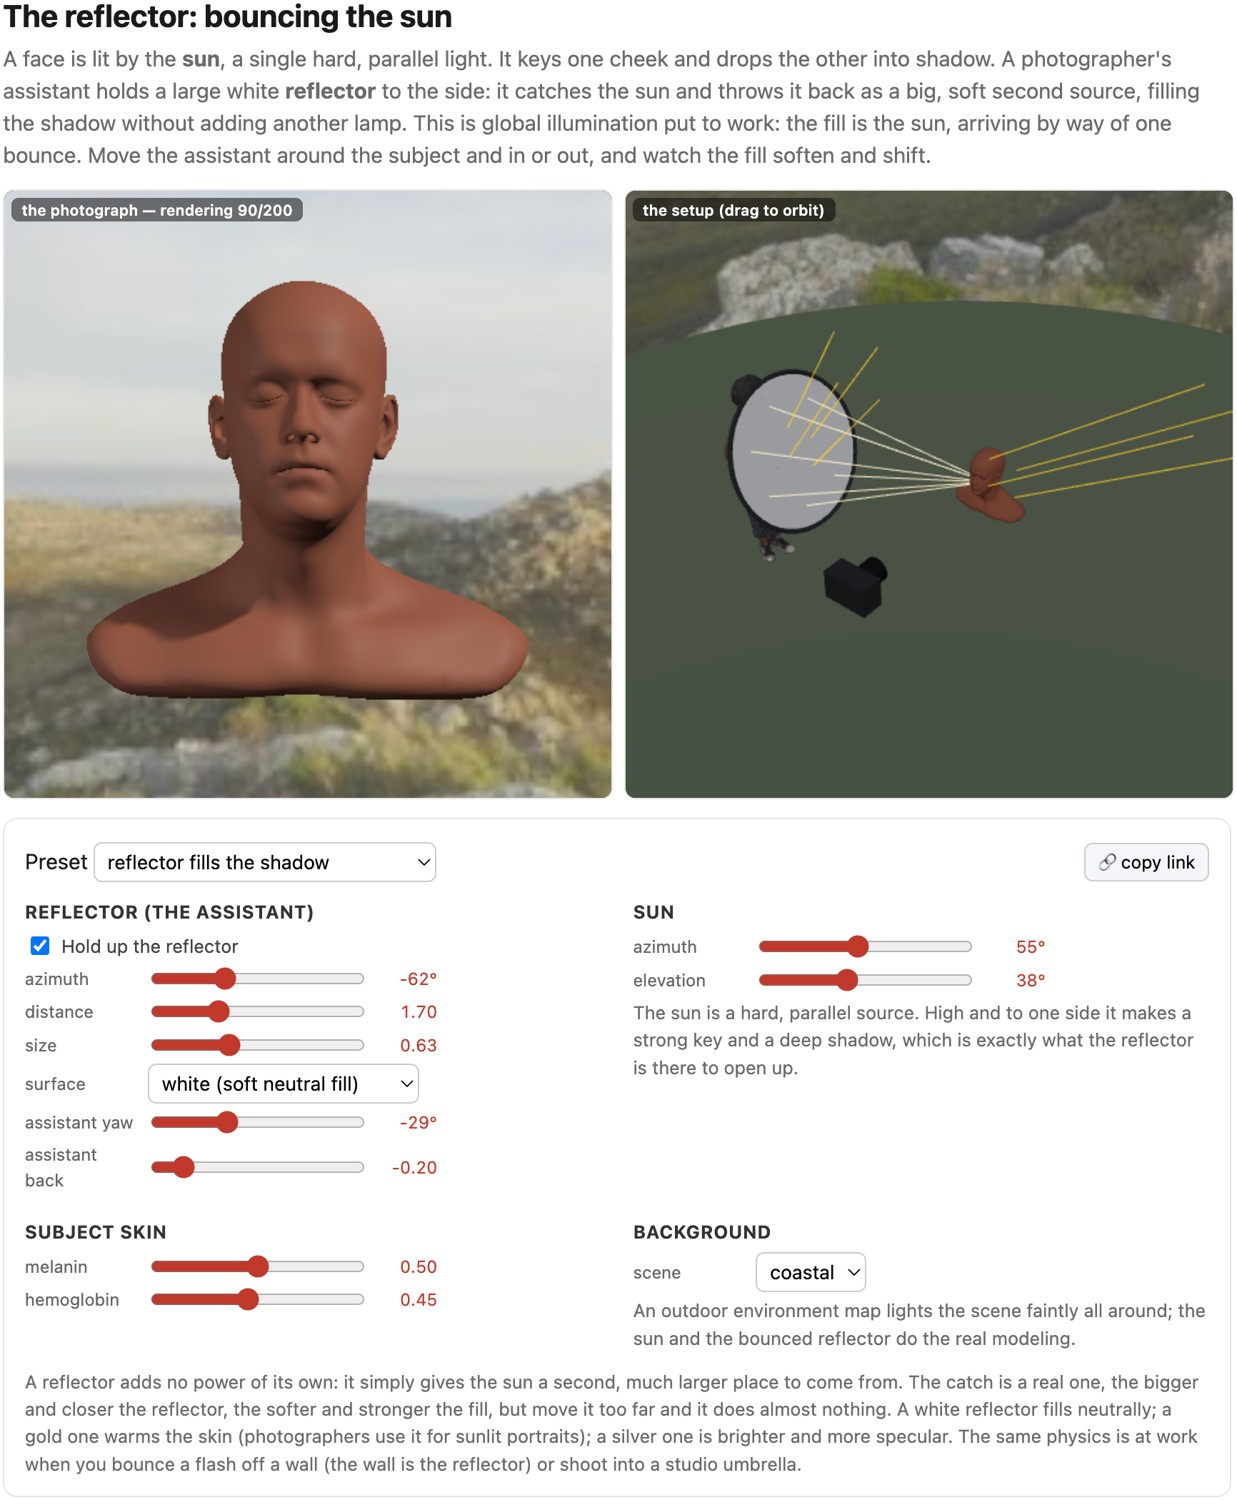
Reflectors and diffusers. The cheapest way to shape light adds no light at all. A reflector is a passive panel held opposite the main source to catch its spill and throw it back into the shadows. The sun or a window keys one side of the face, and the reflector becomes a large, soft second source on the other, opening the shadow without a single watt of its own power (Figure 3.6.5). This is the same one-bounce global illumination met under light physics (Light and physics), put to work: the fill is just the key light arriving by way of one bounce. The surface sets its character. White gives neutral, gentle fill; silver is brighter and more specular, so it fills harder and can serve as a key in a pinch; gold warms the light, which flatters skin in open shade. A black panel does the opposite, negative fill, subtracting stray light to deepen a shadow and restore shape. As with any source, the softness follows the reflector's apparent size: a big panel held close wraps the shadow softly, a small or distant one fills with a harder edge.
A diffuser works by transmission instead of reflection. A translucent scrim or silk placed between a hard source and the subject scatters the light so the whole panel glows, turning the sun or a bare flash into a source as broad as the panel itself. That is exactly what a softbox or umbrella does to a flash, and what a shoot-through umbrella or a clip-on diffusion dome does to an on-camera unit. The rule is the same one that governs bounce: shadow hardness tracks the angular size of the source at the subject, so a larger or closer diffuser softens the light and pulling it away hardens it again. Reflectors, diffusers, bounce, and softboxes are four names for one move, enlarge the apparent source, and all of them run on the physics of light bouncing and scattering on its way to the subject.
3.6.5 Multiple-point lighting⧉
A finished lighting setup is rarely one source. Studio and portrait lighting builds a scene from several lights, each with a defined job, and the art is in their relative placement, size, and power, not their absolute brightness. The classic vocabulary:
- Key light. The main source, the one that defines the direction of the light and casts the primary shadows. Its position sets the whole mood; its size (via softbox, umbrella, or distance) sets how hard those shadows are.
- Fill light. A softer, weaker source near the camera axis (or simply a reflector) that lifts the shadows the key leaves, setting the lighting ratio between the lit and shadowed sides of the subject. A low ratio (fill close to the key in power) is soft and flattering; a high ratio (little fill) is dramatic and sculptural.
- Rim / kicker / hair light. A light behind or to the side of the subject that skims a bright edge along it, separating the subject from the background, the 3-D-layering goal from the chapter opening made literal.
- Background light. A separate source on the backdrop, controlling its tone independently so the subject sits in front of a chosen gray rather than whatever the key happens to spill.
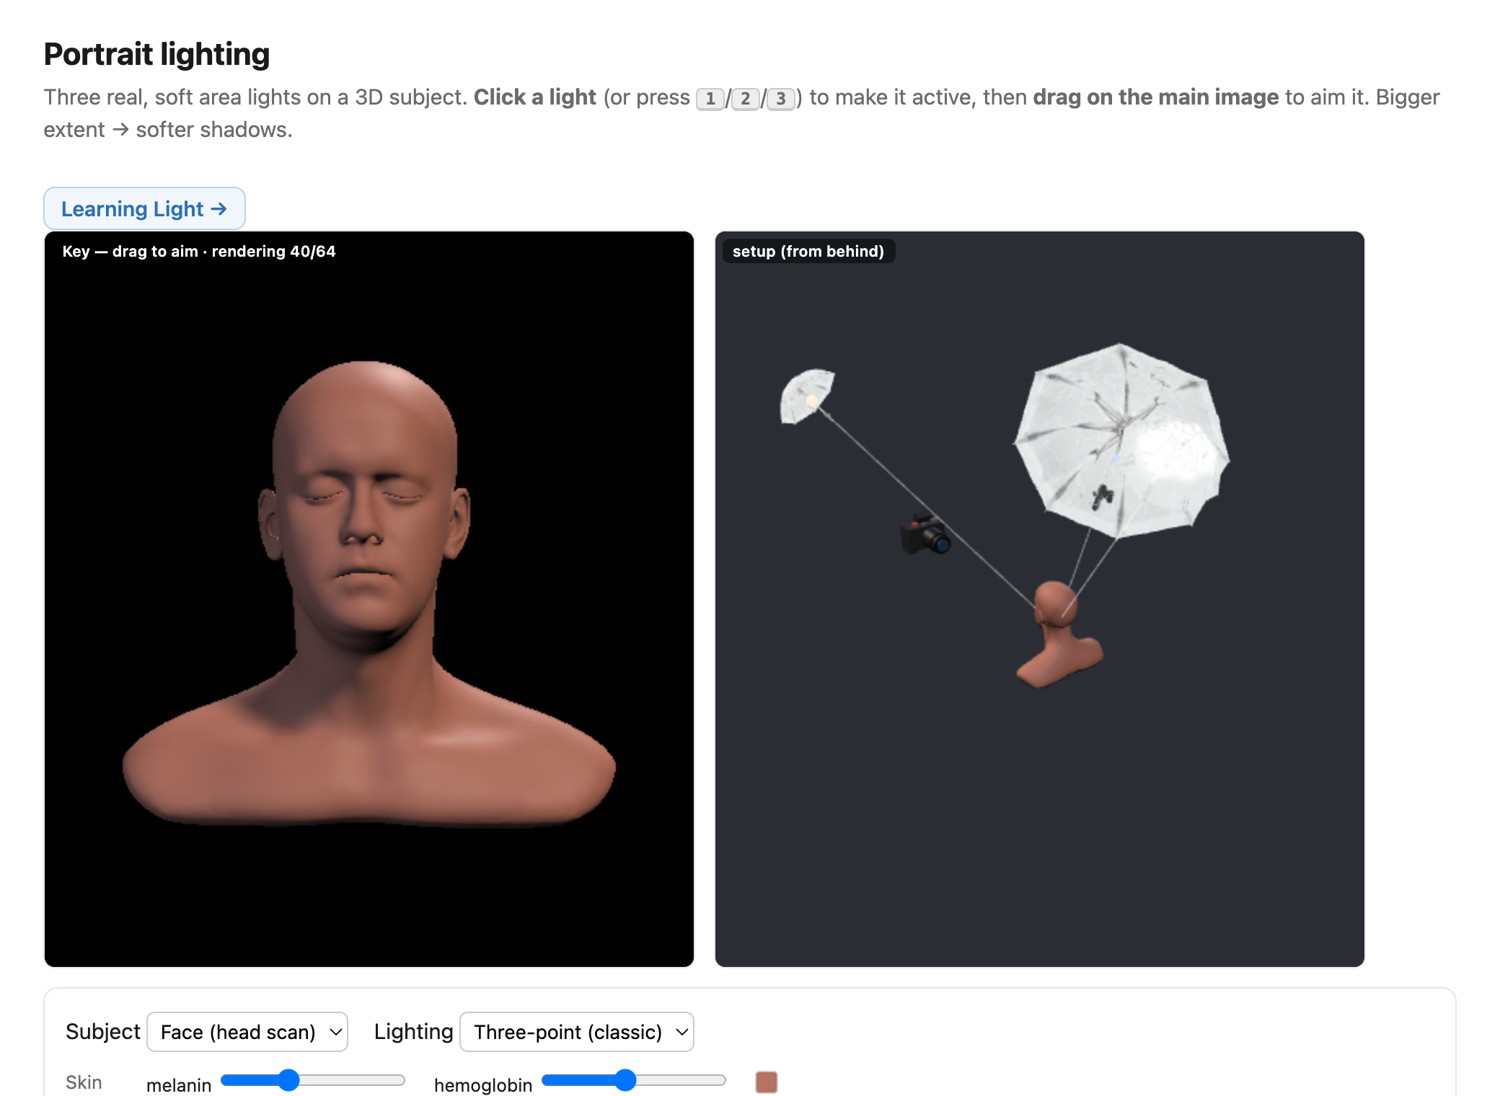
The minimal deliberate setup is three-point lighting, key + fill + rim, the staple of portraiture, interviews, and film. From it grow the classic portrait patterns, named by where the key's shadow falls on the face: butterfly (key high and frontal, a small shadow straight under the nose), loop and Rembrandt (key higher and to the side, the shadow reaching down the cheek to leave a small lit triangle), split (key at the side, half the face in shadow), and clamshell (a soft key above with fill below, for beauty work). Each is really just a key position plus a fill ratio, and the fastest way to feel how placement and size shape a face, far more than brightness does, is to move the lights yourself (Figure 3.6.6).
To actually learn small-flash lighting, work through David Hobby's Strobist blog, starting with its "Lighting 101" series. It is the classic free course on off-camera flash, and it will teach you more about light than any piece of gear. More broadly, lighting is the cheapest way to improve your photography: a modest flash you can get off the camera changes your pictures far more, dollar for dollar, than a new body or lens.